


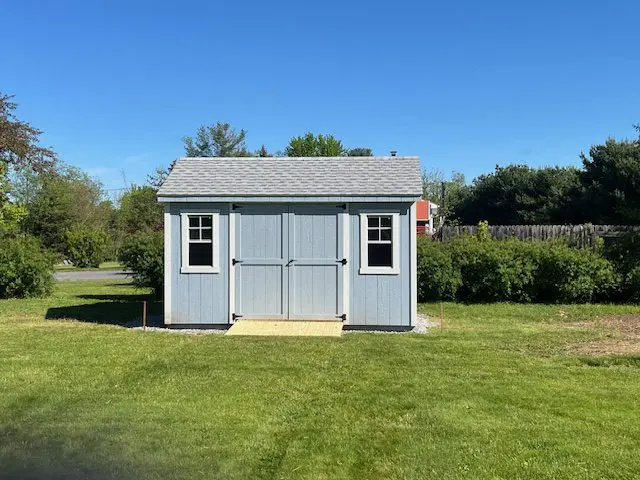
If you have ever spent twenty minutes hunting for a trowel you know you put back last weekend, this post is for you. Most garden sheds start out with good intentions and end up as a jumble of rakes, empty pots, and half-used bags of soil. The problem is rarely the shed itself. It is the lack of a system inside it.
The good news is that you do not need expensive custom fittings or a weekend of backbreaking labor to fix it. The ideas below are simple, affordable, and proven by gardeners who got tired of digging through clutter. Pick two or three to start, and you will notice the difference the very next time you reach for your pruners.
1. Install a Pegboard Wall for the Tools You Use Weekly
A pegboard is the single highest-impact upgrade you can make inside a shed. It keeps your most-used hand tools visible and within arm’s reach, so nothing gets buried at the bottom of a bin.
The trick is to be selective. Hang only the tools you grab at least once a week: pruners, hand trowels, weeders, gloves, and a small saw. Outline each tool with a marker so you always know where it belongs and can spot instantly when something is missing. That outline trick sounds almost too simple to work, but it is the reason pegboards stay organized long after other systems collapse.
2. Go Vertical with Wall-Mounted Racks for Long-Handled Tools
Shovels, rakes, hoes, and brooms take up a shocking amount of floor space when they lean against a wall in a pile. Wall-mounted tool racks, whether store-bought or a simple row of heavy-duty hooks, get them off the floor entirely.
The payoff is bigger than just tidiness. Long-handled tools stored vertically are easier to grab without dragging three others down with them. It also protects the handles, which last far longer when they are not resting on damp concrete. If your shed has exposed studs, you can screw hooks directly into them. If the walls are finished, a mounted track system works just as well.
3. Use a Magnetic Strip for Small Metal Items
Borrowed from kitchen knife storage, a magnetic strip mounted near the door is perfect for the small metal items that vanish the fastest: pruning snips, twist ties, drill bits, and small hand forks.
Because the strip keeps everything in plain sight, you stop doing the pocket-pat and the bin-dig every time you head outside. Mount it at eye level near the entrance so you can grab something on your way out and drop it back the moment you walk in. The easier the return trip is, the more likely the system survives.
4. Group Tools by Task, Not by Size
This is the mindset shift that separates organized sheds from tidy-looking ones. Instead of arranging tools by size or type, build zones around what you actually do.
A pruning zone holds loppers, shears, and a sharpening file together. A planting zone keeps the trowel, hand rake, seed packets, and plant markers in one spot. A soil and fertilizer zone collects the amendments, a scoop, and your gloves. When it is time to do a job, you grab one bin or visit one shelf instead of crisscrossing the shed five times. When the job is done, everything returns to a single home.
5. Add a Pot and Tray Station Near the Door
Stacked nursery pots are the number one source of shed chaos. They topple, they slide, and they swallow whatever is underneath them.
A simple solution is a dedicated pot station: a wire shelf, a wooden crate rack, or even a repurposed bookcase near the door. Sort pots by size, largest on the bottom, and tuck flats and trays vertically like files in a cabinet. Not only does this stop the avalanche, it also makes it easy to see what you have before buying more. Most gardeners are shocked by how many pots they already own once they can actually count them.
6. Put Everything in Clear or Labeled Containers
Opaque bins are where small items go to disappear. If you must use closed containers, label every single one, and be specific. “Hardware” is not a label. “Drip irrigation fittings” is.
Clear stackable bins are even better because they let you see the contents at a glance. Reserve one bin per category: fertilizers, twine and ties, sprayers and nozzles, seed-starting supplies. Clear bins also protect paper goods and seeds from moisture and mice, which brings us to the next point.
7. Keep Seeds and Chemicals Off the Floor and Off High Heat
Seed packets and garden chemicals are the two categories that need special treatment. Seeds lose viability fast in heat and humidity, so store them in a sealed container in a cool spot, or better yet, bring them indoors during summer. A photo case or small recipe box makes a perfect seed library, with dividers by season or plant type.
Chemicals, including fertilizers and pest sprays, should sit on a mid-height shelf away from seeds, tools, and anything a child or pet could reach. Never store them on the floor where a minor flood or spilled watering can could soak the containers. A metal shelf unit keeps them stable and visible.
8. Build a Fold-Down Work Surface
Every organized shed needs a flat place to work, but a permanent bench eats floor space in smaller structures. A fold-down work surface, hinged to the wall, gives you a potting bench when you need it and open floor when you do not.
Even a simple 24-inch deep plywood shelf on heavy brackets transforms how you use the space. You can repot without crouching, write plant labels without hunting for a flat rock, and stage your tools before a big job. Add a small hook underneath for a brush and dustpan so cleanup takes thirty seconds.
9. Use the Door and Ceiling for Overlooked Storage
The back of the shed door is prime real estate that almost nobody uses. A hanging shoe organizer holds gloves, twine, scissors, and small tools in labeled pockets. A row of hooks keeps hats, kneeling pads, and extension cords off the floor.
If your shed has exposed rafters, the ceiling works for lightweight, rarely used items: folding chairs, empty pots, hoses coiled for winter. Just keep heavy or sharp items off overhead racks. The goal is to catch the awkward items that do not fit anywhere else, not to create a hazard.
10. Follow the One-In, One-Out Rule and Schedule a Reset
No system survives contact with a busy growing season without maintenance. Twice a year, ideally in spring and fall, spend an hour resetting the shed: tools back on the pegboard, pots restacked, expired chemicals tossed, broken tools repaired or removed.
Then adopt the one-in, one-out rule. When a new tool comes in, an old one leaves. Sheds overflow because we treat them like attics with windows. A shed that only holds what you actually use stays organized with almost no effort, because everything has a place and every place is visible.
A Quick Word on Getting Started
Do not try all ten ideas in one weekend. That is how organization projects die. Start with the pegboard and the long-handled tool rack, since those two alone will clear most of your floor. Add the zones and bins the following weekend, and the door storage after that.
Within a month, you will find that the shed has quietly become the most efficient corner of your yard. You will grab what you need on the first reach, put it back without thinking, and spend your gardening hours actually gardening. That is the whole point of a shed in the first place.
Nguồn: residencestyle